Join My Team with Stampin' Up!

Monday, February 28, 2011

Die Cut Flower Pins

I loved the Koozi so much that I decided to make some pins.  I cut the flowers from the Fun Flowers Bigz L Die that is in the new Occasions Mini.  I cut the flowers from white felt.  I developed a new technique using reinkers and alcohol in a mini mister bottle.  It makes the most beautiful flowers that are lighter in the center and darker on the edges. I used an Antique Brad to put the flower petals together. The leaves are from the Island Floral Sizzix Die. They are colored the same way as the flowers. I added my own little flourish using scrap pieces of ribbon and a little piece of black tulle.  I think these pins turned out just tooooooo, tooooooo cute.  I'd love to hear your thoughts, so please take a second to leave a comment.  If you're interested in any of the dies or other supplies I used, please email me.

Thursday, February 24, 2011

Want a cup? Koozie that is!

Is this not the cutest Coffee or Tea Koozie ever?  I've seen others on line created by very talented crafters.  I kind did my own thing with this one, cutting the flowers from the Fun Flowers Bigz L Die that is in the new Occasions Mini.  I cut the flowers from white felt. White you say? Yes White, I know crazy, right?  I developed a new technique using reinkers and alcohol in a mini mister bottle.  It makes the most beautiful flowers that are lighter in the center and darker on the edges. I used an Antique Brad to put the flower petals together. The leaves are from the Island Floral Sizzix Die. They are colored the same way as the flowers. I added my own little flourish using scrap pieces of ribbon and a little piece of black tulle.  I think it turned out just tooooooo, tooooooo cute.  I'd love to hear your thoughts, so please take a second to leave a comment.  If you're interested in any of the dies or other supplies I used, please email me.

Wednesday, February 23, 2011

March Technique Class

Isn't this the cutes card?  This is the card and calendar we made for my monthly technique class.  We tried out a marbleized technique using marbles, re-inkers and Glossy CS.  This is how we created the background for the card and the calendar. The shamrock was created using the wing from the two-step bird punch.  A piece of glossy CS was used for the sky using a scallop circle and a sponge with Not Quite Navy ink.  For the rainbow we put drops of re-inker on a sponge, misted it with water and swiped it across the sky creating our rainbow. A 1 1/4" circle and word window punch were used to make the pot at the end of our rainbow.  To create the gold, we used a piece of textured CS, coated it with VersaMark and heat embossed with Gold Embossing Powder. Then we used the small circles in the Owl punch to make the gold coins.  The grass is the 5 star flower punch with the petals snipped into strips and folded in half.

Monday, February 21, 2011

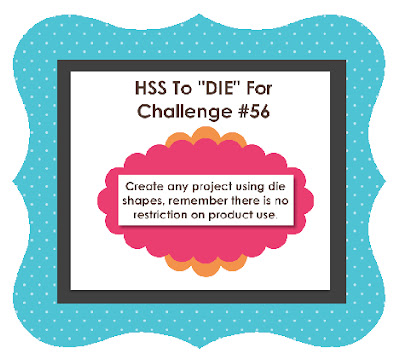
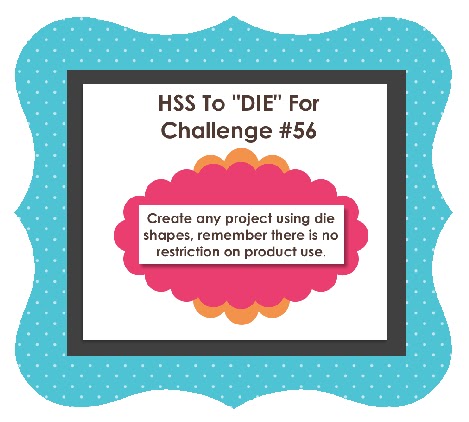
Hand Stamped Sentiments - To "Die" for Challenge #56


I designed this card for this week's Hand Stamped Sentiments.  I hope that each of my followers and subscribers will join me this week in the challenge to create something using die cutouts. I decided to use the Beautiful Butterflies Sizzix Die by Stampin' Up!.  I cut the butterfly out of whisper White CS and stamped images from the Clearly for You (Occasions Mini) and Bliss (Sale-a-Bration) Stamp Sets. The sentiment is from Word Play. I tried a new combination of colors, Concord Crush and Marina Mist.  The top embossed piece was kinda a science experiment.  I embossed it with the Perfect Polka Dot Embossing Folder, then sponged Concord Crush ink all over it.  Then I took shimmer mist and sprayed they piece I had sponged and using the sponge smoothed out the shimmer mist and ink so that it didn't look blotchy. It really is a pretty look in real life. I hope you'll leave your thoughts in the comment area.  If you'd like to get any of the supplies for this card, please email me at sherrysinknstamps@yahoo.com.  I'd love to help you out.  Also if you are interested in becoming a Stampin' Up! Demonstrator, there is a great opportunity during Sal;e-A-Bration thru March 31st.  Not only can you customize your starter kit, but you get a 15% discount and an additional $50 Bonus Bundle. That's $360.00 of product for only $148.75.  I would really love for you to join my team.  If you like my work, want to get a great discount on  every order you place, make new friends and have an income to help you pay bills or support your stamping, then please let me email me.

Clearly for You

I've been wanting to use the acrylic Beveled Windowpanes for a while. The Large Pane coordinates exactly with the large rectangular floral flourish in the Clearly for You Stamp Set in the Occasions Mini. I decided to pair my windowpane with Not Quite Navy ink and cardstock and Springtime Vintage DSP/ To give the Night of Navy CS some interest, I stamped the Bliss flourish in Night of Navy ink, having stamped it off first for a tone on tone look. The sentiment is from the Clearly for you stamp set as is the flourish around it that was modified to fit the med oval punch.  It is backed with the Modern Label punch cut in half and trimmed to fit the sentiment.  I hope you enjoy this card.  If you'd like to get any of the supplies for this card, please email me at sherrysinknstamps@yahoo.com.  I'd love to help you out.  Also if you are interested in becoming a Stampin' Up! Demonstrator, there is a great opportunity during Sal;e-A-Bration thru March 31st.  Not only can you customize your starter kit, but you get a 15% discount and an additional $50 Bonus Bundle. That's $360.00 of product for only $148.75.  I would really love for you to join my team.  If you like my work, want to get a great discount on  every order you place, make new friends and have an income to help you pay bills or support your stamping, then please let me email me.

Friday, February 18, 2011

Because I Care

I haven't used the Because I Care Hostess stamp set in a long time.  I forget just how beautiful it is.  This card has many facets. I used the Big Shot and the new Tasteful Trim Sizzix Die to cut the Basic Black scallop trim for the edge of the Pear Pizzazz CS that is stamped with En Francis and embossed with the Vintage Wallpaper embossing folder.  I sponged the Pear Pizzazz with Always Artichoke ink to give it added dimension.  The Hydrangea stamp was inked with Stampin' Write Markers, using the Always Artichoke for the stem and leaves and Concord Crush for the flower.  After stamping the image I used a blending pen and ink from the stamped image to add the background color. On the leaves I added a touch of So Saffron ink for highlight. After cutting the image out I added dimensionals and 1/2" poly ribbon for a finishing touch.

If you need any of the supplies to create this beautiful card, please email me.  I'd love to be your Stampin' Up! Demonstrator.

Thursday, February 17, 2011

Baby Tees

Well my vision for this card turned out a little skewed.  I guess I should have checked the size of the clothes pins before putting my plan into action. LOL  But none-the-less, it still turned out kinda cute. I made the sky with a scallop circle and Not Quite Navy ink on a sponge.  The paper and ribbon are From Sale-a-Bration (Ice Cream Parlor).  Woo Hoo Free paper and ribbon!  The Onsies are from the Baby Tees Jumbo Wheel, and colored with markers and cut out. The sentiment is also from Sale-a-Bration (So Happy for You).

Wednesday, February 16, 2011

Fifth Ave Floral Bouquet

What a g-o-r-g-e-o-u-s bouquet! Wouldn't this make a beautiful wedding invitation/announcement or bridal shower invitation?  These roses are what I call the MacIver Rose technique.  You can check out Sandi MacIver's blog for additional information on how to make these roses, she has a tutorial. They are very easy and so much fun.  I started with a 12 x 5.5" piece of paper.  I scored it at 4" and 8.25 leaving folded panels of 4" and 3/75".  I placed 3 roses on the front 4" panel and 2 roses are the panel that lies underneath., creating the look of a bouquet.  I've had this design in my mind for a while, so I'm glad to be sharing it woth you. I used the Fifth Ave Floral rose and embossed it with white embossing powder.  The roses are colored with So Saffron, Pink Pirouette, Peach Parfait and Cajun Craze re-inkers. Using the Big Shot, I embossed the base card with the Vintage Wallpaper embossing folder.

Monday, February 14, 2011

Hand Stamped Sentiments Challenge Blog #55

 
I hope each of you will join me this week iin the challenge at Hand Stamped Sentiments. This week the challenge is a sketch challenge.  I took the sketch litterly, to me at least.  Yes, it looks like a jeans pocket, but you can use any shape for the pocket that you want.  I used blue monocramatic colors for my card (Bashful Blue, and Not Quite Navy) Don't you just love how the Presto Patterns DSP looks.  I thought the Paris looked like a jenas logo and the flourish (which I think looks like an embroidered design) is from the Sale-a-Bration Stamp Set Bliss.  Wouldn't you just love to rock a pair of awesome jeans like this?  Have fun with the challenge this week.  I'd love to see some of my followers and subscribers join in on the challenge.

Happy Valentine's Day

I wanted to wish my friends and family, followers and subscribers a very Happy Valentine's Day.  This was a fun card to make.  I hand cut a large heart, embossed it with the Petals-a-Plenty embossing folder in my Big Shot and sponged real red ink all over it.  I put chunky clear glitter in the centers to add a little sparkle.  The DSP I used is Filled with Love along with Blushing Bride CS. The sentiment is from the Filled with Love Stamp Set, stamped and punched out with the Modern Label punch.  It's all tied off with a perfect bow of 1/2" Stitched Polly Ribbon in Blushing Bride.

Friday, February 11, 2011

Love Letters

These cards use the Love Letters DSP.  The colors are some of my all time favorites to use together.  Who wouldn't love Very Vanilla, Basic Black and Riding Hood Red. These were very quick cards to make. The heart stamp is from the Filled with Love Stamp Set

If you need additional information about any of the supplies I used to create these cards, please email me. I'd love to be your Stampin Up Demonstrator.

Thursday, February 10, 2011

Desk Organizer

 
I've been wanting to show y'all  the Desk Organizer I designed for my technique class.  The top pic is the front of the organizer....it uses SU's awesome black CS, cork sheets and 2 coasters. One coaster is covered in cork making it a great place to tack up notes.  The other side is a coaster also covered in black CS, the monthly technique is adheared topping it off with a coordinating stamped image.  On the bottom is the claendar for the month.  Each month the class learns a new technique that coordinates with an image and the monthly calendar.  The cool thing about this Desk Organizer is that it is 8.5" wide...big enough to have the cork board, post it notes, a pen and sticky flags.  It sits up on little wooden knobs painted black.  In the bottom pic you can see the back of the organizer.  It has a tray underneath that holds the months that have passed by.  Then when a new year comes along, you simply glue the current calendar over last year's and continue yr after yr.  By the time we finish at the end of the year, not only will the class have a organizer with a calendar for a whole yr, but a book of all the techniques we learned over the year because each month we learn a new technique while making the new claendar, we will also be making a 6 x 6" page for a technique book we will bind at the end of the year.  If anyone is interested in getting instructions, please let me know.  I will be putting a tutorial (for the organbizer only, not any techniques) together to sell very soon.

If you are interested in amy of the materials I used for this project, please email me, I'd love to be your Stampin' Up! Demonstrator.

Wednesday, February 9, 2011

Ice Cream Parlor

This adorable card took litterly less than 5 minutes to make. It's made with FREE paper from the Sale-a-Bration catalog called Ice Cream Parlor. The package of paper has all coordinating patterns/colors and decorative elements and trim. All I added was some taffeta ribbon for the stems and leaves.If you need any of the supplies to make this cutie, please email me, I'd love to be your Stampin' Up! Demonstrator.

Monday, February 7, 2011

Hand Stamped Sentiments Challenge Blog #54


Our challenge this week is to use ribbon and lace on a card.  As you can tell I'm still stuck in Valentine mode. I just love Valentine cards....they seem so romantic to me.  Anyway this one was very simple.  I used Glossy White CS, ran the embossing buddy over it to remove the static, then stamped the Bella Toile Background Stamp in VersaMark, sprinkled on Black Embossing powder and heat set with the heat tool and presto-chango.....a G-O-R-G-E-O-U-S piece of paper to create a beautiful card on.  The rest was simple...I stamped the Be My Valentine a la carte stamp (Occasions Mini) in Versa Mark and like the background stamp used black embossing powder on the image.  Then I colored the area left white by the stamp with my Real Red Stampin' Write Marker and then cut the image out.  I glued it to a scrap of Red Glimmer Paper and cut around the heart/banner shape leaving a nice margin so the glimmer paper would show.  Before I glued all to the card base, I wrapped the art piece with a piece of lace from my sewing stash and before tying it in a knot, I tucked in some of my my favorite ribbons, 1 1/4" striped Grosgrain Ribbon (black); 5/8" Black Satin Ribbon;  and 1/8" Black Taffeta Ribbon, then finished tying the knot.  This created another focal piece on the card, a beautiful array of ribbon (scraps).  I just love using my scraps.  I have a large jar full of ribbon scraps and one for strips of paper also.  Ya never know when you might need just a little piece of something.

I hope you will join us in the Hand Stamped Sentiments Challenge this week. And remember, if you need any of the the supplies I used to create this card, please email me and let me know. And don't forget the awesomeness of Sale-a-Bration (free product from the Sale-a-Bration Catalog for every $50 you spend) and the great offering that Stampin' Up! has on becoming a Demonstrator.  The new Demonstrator kit is over $360.00 worth of products for $148.75 and you can even customize your kit. Please let me know if you have any questions about my card, Sale-a-Bration or becoming a demonstrator.  I'd love for you to join my team.  All materials (except the black lace) are by Stampin' Up!

Blissful Heart

Bev Watt's recent card was the inspiration for this card.  Although I did change mine up a bit, sometimes a girl just needs a jump start with inspiration from someone.  The trim was created using the Tasteful Trim Sizzix Die out of Basic Black and Red Glimmer Paper. The flourish from the Sale-a-Bration Stamp Set Bliss was stamped in VersaMark and embossed with black embossing powder. I wanted to make my card a Valentine card so instead of using the Butterfly from the Bliss set, I used the Scalloped Heart of Hearts Sizzlit  with a Red Glimmer Heart punched with the large heart punch. Base card color is a favorite Blushing Bride accented with Riding Hood Red.  I used the punch template from the Mat Pack to create a little interest in opposing corners.  It's all topped off with my favorite Striped Grosgrain Ribbon in Black.

Friday, February 4, 2011

Heart to Heart Valentine

My friend Lee Conrey inspired this card.  This was actually a very fast card to make.  The biggest challenge was deciding what size to cut the layers of Whisper white and Riding Hood Red CS.  The Heart to Heart punch was used for the hearts out of Red Glimmer Paper. The scallop trim was cut using the Tasteful Trim Sizzix Die out of more Red Glimmer Paper.  I tied it all off with 1 1/4" Striped Grosgrain Ribbon.  All supplies by Stampin' Up! Please contact me at sherrysinknstamps@yahoo.com to purchase the materials and supplies for this project.

Thursday, February 3, 2011

Letter Full of Hearts


I want to thank Gretchen Barron for the inspiration for this card.  I think it is such a different look for a Valentine card.  Plus, I love the look of black with the other bright colors...it's kinda non-traditional.  Although Gretchen didn't have the scallop envelope (Sizzix die) on her card, I thought it would be so cute to let the hearts look like they were escaping to find their true love.  Ahhhhhh, such a romantic.  Anyone have a spare Cupid laying around?  I think I could definitely use one. The Sentiment is from Word Play stamp set. I used the Square Lattice Embossing Folder to inlay the hearts and envelope into the background black CS.  This was an good way to use up a lot of scraps.  If you's like to order the supplies for this card, just email me. I love to help you with your order.

Wednesday, February 2, 2011

Be My Valentine

This card highlights the Be My Valentine 'a la carte stamp. I used the poppin' pastels technique for the focal image.  This technique uses VersaMark to stamp the image, then you use Stampin' Up pastels to color the it.  I used several shades of red on the interior of the image and black around the edge.  Scrap strips of real red CS and Red Glimmer paper create a frame for the focal image and accent hearts punched with the small heart punch.  To order the supplies used to create this card or others on my blog you can email me or shop here.